Power Your Rig Anywhere the Sun Reaches
Running low on battery halfway through a boondocking trip is one of the fastest ways to cut a trip short.

An RV solar panel kit fixes that: mount a few panels on the roof, add a charge controller, and your battery bank tops itself off all day — no generator noise, no campground hookup needed.

This guide covers the panel types, sizing math, and installation steps you need to choose the right kit for your rig, whether you're running a travel trailer, fifth wheel, or Class A motorhome.
Most RV solar kits install in a single afternoon with basic hand tools — no electrician, and in most cases no permit, since it’s treated as a vehicle modification rather than a structural build.
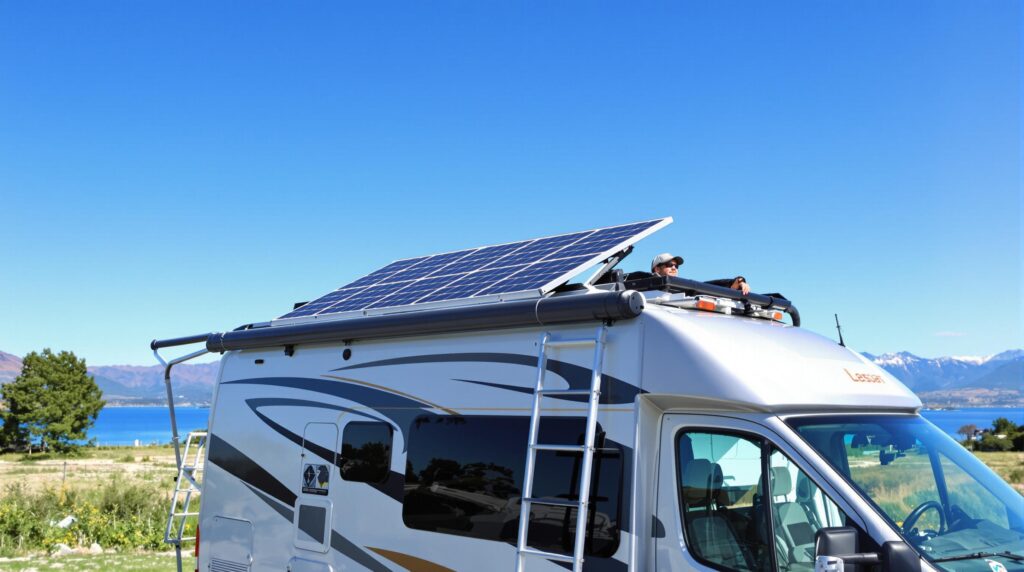
Types of Solar Panels for RVs
| Panel Type | Efficiency | Value for Money | Best For |
|---|---|---|---|
| Polycrystalline | ~16% | Lowest price per watt | Budget builds, flat roofs with plenty of space |
| Standard monocrystalline | ~18% | Good balance of price and output | Most RV roofs, sunny climates |
| Monocrystalline back-contact (e.g. SunPower) | Up to 24% | Higher price, higher output per sq ft | Tight roof space, low-light performance at sunrise/sunset |
| Monocrystalline PERC | ~21% | Strong value, handles mixed light well | Changeable weather, partial-shade tolerance |
| Flexible | Varies by cell type | Costs more than a rigid panel of equal power | Curved roofs, weight-sensitive rigs — can lose up to 10% output in high heat |
| Rigid | Varies by cell type | More affordable than a flexible panel of equal power | Most installs — aluminum frame keeps panels cooler and lasts longer |
☀️ Monocrystalline panels cost more but pack more watts into the same roof space — the better pick for tight RV roofs.
🔋 Pair any panel with an MPPT controller; it recovers 20-30% more energy than an older PWM controller.
🛠️ Most prefab kits bolt on in under a day, no electrician required.
How an RV Solar Kit Works
An RV solar kit converts sunlight into electricity that recharges your house battery and runs your onboard devices. The core components are the solar panel, an MPPT charge controller, a deep-cycle battery, and the wiring that ties them together. As a rule of thumb, a 200W kit comfortably keeps a fridge and basic electronics running through an overcast day; boondockers running AC or an induction cooktop typically need 600W or more.
Installing solar doesn’t have to mean full energy independence — even a small kit meaningfully cuts how often you need a campground hookup or a noisy generator run. According to the U.S. Department of Energy, solar costs have fallen sharply over the past decade, which is part of why small kits are now affordable enough for casual RVers, not just full-time boondockers.
Solar Panel Types: Monocrystalline vs. Polycrystalline
Panels come in two main types: monocrystalline and polycrystalline. Monocrystalline panels are black, more space-efficient, and can reach around 22-24% efficiency — worth the extra cost on a roof with limited space. Polycrystalline panels have a blue tint and cost less, trading some efficiency for a lower price per watt. Back-contact monocrystalline panels (like SunPower’s) keep producing more power in low-light, sunrise, and sunset conditions.
An MPPT charge controller matches the panel’s voltage to what your battery can accept, preventing overcharging and typically recovering 20-30% more usable energy than an older PWM controller. On a 120W panel, for example, an MPPT controller can deliver close to the panel’s full rated output, while a PWM controller often loses a third of it to voltage mismatch.
Choosing a Battery for Your RV Solar Kit
Lithium (LiFePO4) batteries are the standard pairing for a modern RV solar kit. They deliver roughly 3,000-5,000 charge cycles compared to 300-700 for a similar AGM lead-acid battery, so one lithium battery can outlast several AGM replacements. A 100Ah lithium battery also weighs about a third of an equivalent AGM battery — a real difference if you’re watching your RV’s cargo capacity. Go RVing’s RV solar power guide is a good next read if you want a deeper walkthrough of battery pairing.
To choose the right battery for your RV solar kit:
- Size capacity (in Ah) to your daily consumption — most RVers use 80-100 Ah per day for basic camping
- Match the battery box dimensions to your existing storage space
- Compare cycle life — lithium can run 5-10x longer than AGM before it needs replacing
- Choose lithium (LiFePO4) if weight and usable depth of discharge matter to you
- Look for a built-in battery management system (BMS) on any lithium battery for safety and longevity
Victron Energy and EcoFlow are two widely available brands with complete monitoring apps, so you can check your battery’s state of charge from your phone without opening a panel.
Need help sizing capacity or comparing chemistries in more depth? Our full guide to solar panel batteries breaks down BMS features, depth of discharge, and how to match a battery to your specific kit.
How to Size Your RV Solar Kit
Assess Your Energy Needs
Start by listing your appliances’ wattage and how many hours a day you run each one, then multiply watts by hours to get watt-hours (Wh) per day. A typical RV fridge uses about 400-600 Wh per day running on 12V DC.
Ten LED interior lights running a few hours a night add roughly 10 Ah per day. A 100Ah battery stores about 1,200 Wh usable — so for 800 Wh of daily draw at 12V, you need around 67 Ah of capacity. Add a 20-30% buffer for cloudy days and system inefficiencies.
Choosing the Right Solar Panel Power
Your roof space sets the ceiling on how much power you can install — a 100W panel takes up roughly 1m² (about 10-11 sq ft). Back-contact monocrystalline panels pack more watts per square foot than polycrystalline, worth considering if roof space is tight. Leave a few inches of clearance around each panel for airflow and mounting hardware.
Weekend or occasional campers typically do fine with 100-200W. If you want closer to full energy independence while boondocking, plan around your daily Wh needs — most setups land between 200-400W, and larger rigs running AC or an induction cooktop can need 800W or more.
Why the Charge Controller Matters
An MPPT controller extracts 5-30% more usable energy than a PWM controller by converting a panel’s excess voltage into extra amperage instead of wasting it as heat. On an 18V/5.5A panel, for example, an MPPT controller can deliver around 99W, versus roughly 66W from a PWM controller on the same panel.
Victron Energy’s SmartSolar controllers are a common choice among RVers, with efficiency ratings up to 98% and Bluetooth monitoring through the VictronConnect app, so you can check production from your phone without climbing on the roof.
Sizing Cables and Accessories
Undersized wiring wastes power as heat and can be a fire risk, so size cables to your amperage, not just your budget. As a rule of thumb, 10 AWG wire comfortably handles the current from a single 100-200W panel over a short run, and voltage drop should stay under 2%.
MC4 connectors are the standard for a secure, weatherproof panel-to-controller connection. A dedicated waterproof cable gland protects the wire where it passes through the roof, and adhesive mounting systems designed for RV roofs let you mount panels without drilling if you’d rather avoid extra holes.
Installing a Solar Kit on Your RV
Installation Preparation and Planning
Before you start, confirm your energy needs match the kit size you bought, clean the roof thoroughly, and double-check that every component is compatible. Pick a mounting spot that stays clear of shade from vents, antennas, and AC units — even partial shade can significantly cut a panel’s output.
Basic tools cover most installs: a screwdriver, crimping pliers, a wrench set, and a multimeter to confirm voltage and current once everything’s wired up. If you’re not comfortable working on your roof or with 12V wiring, a mobile RV technician can typically complete the install in a few hours.
Mounting the Panels on the Roof
Panels are typically secured with a weatherproof adhesive (Sika-brand adhesives are a common choice) or mechanical brackets — flexible panels can usually be glued directly to the roof, while rigid panels need standoff brackets for airflow underneath.
Clean and degrease the mounting surface first, apply adhesive evenly, and set the panel in place using a mounting system that resists wind lift at highway speeds. Let the adhesive cure fully — usually 24-48 hours — before driving.
Complete RV Solar Kits: What to Look For
Advantages of Complete Kits
A complete kit bundles the panel, charge controller, and wiring so every component is already matched — no guessing whether your controller can handle your panel’s output. Plug-and-play kits in the 100-200W range are typically ready to run in under an hour with no specialized tools.
Because the components are pre-matched, connectors and roof mounts tend to be plug-compatible out of the box, which is why these kits appeal to RVers who want power without becoming an electrician.
What to Compare Before You Buy
Rather than chasing a specific brand, compare kits on these criteria: total wattage versus your calculated needs, panel type (monocrystalline for tight roof space), controller type (MPPT over PWM whenever the price difference is reasonable), and warranty length — 25 years is standard for the panels themselves, though controllers and batteries are usually covered separately and for less time.
For safety, look for components carrying UL certification (UL 1741 covers inverters and charge controllers) — it’s a clearer signal a kit meets US electrical safety standards than a spec sheet claim alone. Victron Energy and EcoFlow are two established brands that show up frequently in RVer reviews and both sell directly in the US.
As a starting point, here’s how RV solar kit sizes typically map to how you camp:
| RV Use Case | Panel Wattage | Battery Bank | Good For |
|---|---|---|---|
| Weekend camper, campground stays | 100-200W | 1 x 100Ah AGM or lithium | Lights, phone charging, water pump |
| Boondocking a few nights at a time | 300-600W | 1-2 x 100Ah lithium | Fridge, laptop, CPAP, occasional microwave |
| Full-time boondocking | 800-1200W+ | 2-4 x 100Ah lithium | AC (with generator backup), induction cooktop, multiple devices |
- Total wattage versus your calculated daily energy needs
- Monocrystalline panels for the best watts-per-square-foot on a limited roof
- MPPT controller (not PWM) for maximum charging efficiency
- UL-certified components for safety and insurance peace of mind
- Warranty length — 25 years for panels is the market standard
- Lithium (LiFePO4) battery compatibility if you plan to boondock often
If you’re comparing options across different RV types — travel trailer, fifth wheel, van, or truck camper — the sizing principles stay the same; only your available roof space and typical power draw change.
A solid RV solar kit comes down to three things: monocrystalline panels sized to your roof, an MPPT controller, and a lithium battery sized to your actual energy use. Get those right, and a prefab kit will get you most of the way to camping without a hookup.
Ready to turn your roof into a power source? Compare kit sizes above, size your battery to match, and you’ll be boondocking without counting down the hours until your fridge dies.
FAQ – RV Solar Panel Kits
How much shade can an RV solar panel handle?
Even partial shade meaningfully cuts output, because panel cells are wired in series — shading one cell can drag down the whole panel’s production. Shade also creates hot spots that damage cells over time, so pick a parking and mounting spot that stays clear of vents, AC units, and overhanging branches whenever you can.
How many watts of solar do I need for my RV?
It depends on how you camp. Weekend campers running lights and a phone charger are usually fine with 100-200W. Regular boondockers running a fridge and a few devices typically want 300-600W, and full-time off-gridders running AC or an induction cooktop often go 800W or more. See the sizing table above for a quick starting point.
Do I need a permit to install solar panels on my RV?
In most cases, no — RV solar is treated as a vehicle modification rather than a structural build, so it typically doesn’t require a building permit the way home solar does. Requirements vary by state and by RV park, though, so it’s worth a quick check if you’re unsure, especially before a permanent roof-mounted install.
How does solar power perform in winter?
Output usually drops to around a quarter of summer levels, since days are shorter and the sun sits lower in the sky, while heating and lighting use pushes consumption up at the same time. Angling portable panels toward the sun, keeping snow off the panels, and using an MPPT controller all help offset the seasonal drop.
Can a solar kit run my RV’s air conditioner?
It’s possible, but it takes a large system — most AC units draw more power than a typical RV solar setup provides continuously, so you’d need a sizable panel array (often 800W+) paired with a large lithium battery bank and a suitably rated inverter. For most RVers, solar handles the daily loads while a generator covers AC as backup.
What’s the difference between a 12V and 24V solar setup?
A 24V system moves the same power at half the current, which means thinner wiring and less voltage drop over long cable runs — useful on larger rigs with big arrays. Most smaller RV kits stick with 12V because it matches standard RV appliances and battery banks without needing a converter.
How long does an RV solar kit last?
Panels are built to last 20-30 years, typically backed by a 25-year warranty, with only gradual output loss over that time. Charge controllers usually last 8-12 years, and a well-maintained lithium battery can run for 10-15 years before it needs replacing.
Explore our other plug-and-play kits: van solar kits, shed solar kits, and balcony solar kits.