If you’re tired of hunting for an outlet at the campground, or you just want your fridge and lights to keep running without the engine on, a van solar kit solves it in a weekend. Mount a panel (or two), wire it to a battery, and the sun does the rest — no shore power, no generator fumes, no noise.
Most van solar kits install with basic hand tools in a day or less.
No CDL, no permit, no electrician — it's treated as a vehicle accessory, not a structural build.
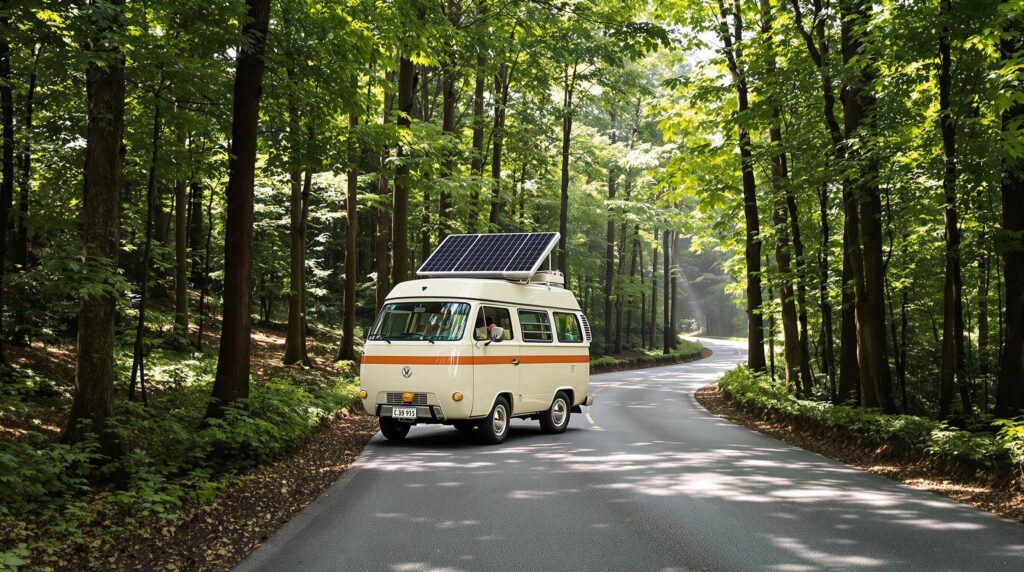
Roof-Mount or Portable: Which Fits Your Van?
Every van solar setup starts with one decision: bolt the panel to the roof, or keep it portable and set it up wherever you park.
- Roof-mount panels charge all day without you touching them, even while driving. Better if you camp in the same spot for more than a night or two.
- Portable panels can be angled straight at the sun for more output, and don’t care if your van is parked in the shade. Bulkier to store, and they only work while you’re stopped.
| Setup | Best for | Trade-off |
| Roof-mount rigid | Full-time vans, long stays in one spot | Fixed angle — less efficient if parked in shade |
| Roof-mount flexible | Curved or low-clearance roofs | Runs hotter, shorter lifespan than rigid |
| Portable / foldable | Weekend trips, shaded campsites | Has to be set up and packed away each time |
What’s In a Van Solar Kit
A complete kit has four parts, and skipping any of them means you’re not actually set up to run anything:
- Solar panel(s) — monocrystalline panels are the standard choice for van roofs; they pack more watts into a tight space than polycrystalline.
- MPPT charge controller — matches the panel’s output to what your battery can accept. An MPPT controller typically recovers 20-30% more usable power than an older PWM controller, which matters when your entire roof is maybe 30-40 sq ft.
- House battery — lithium (LiFePO4) is the standard pairing today: more usable capacity, lighter weight, and thousands more charge cycles than lead-acid. Weight matters more in a van than in a stationary shed, so this is one place it’s worth spending more upfront. Our guide to solar batteries breaks down capacity, depth of discharge, and how lithium compares to AGM if you want the full picture.
- Wiring and connectors — MC4 connectors for the panel-to-controller run, a sealed cable entry gland where wires pass through the roof, and wiring sized to your amperage rather than just what’s cheapest.
If you’re also running a DC-DC charger off your van’s alternator, that adds charging while you drive — useful backup on cloudy days, but it’s a separate system from the solar side, not a replacement for it.
How to Size Your Kit
Sizing comes down to matching your daily power draw to what your roof (and battery) can realistically deliver.
- List what you’ll run — fridge, lights, laptop, phone, maybe a fan or water pump — and how many hours a day each one draws power.
- Multiply watts by hours to get watt-hours per day (Wh/day). A compressor fridge typically runs 400-600 Wh/day on its own.
- Add a 20-30% buffer for cloudy days and system losses, then size your battery for at least a day or two of runway without sun.
- Check your roof space — a 100W rigid panel takes up roughly 10-11 sq ft, so roof size puts a real ceiling on how much you can install without going portable.
Example: a compressor fridge (500 Wh/day) plus lighting and device charging (150 Wh/day) adds up to about 650 Wh/day — which a 200W roof array on a sunny day, paired with a 100Ah lithium battery, comfortably covers.
Typical Van Setups by Use Case
| Use case | Panel wattage | Battery | Covers |
| Weekend van life | 100-150W | 1 x 100Ah lithium | Lights, phone charging, water pump |
| Regular van dweller | 200-400W | 1-2 x 100Ah lithium | Fridge, laptop, fan, lighting |
| Full-time / remote work | 400-800W | 2-3 x 100Ah lithium | Fridge, induction cooktop backup, multiple devices, off-grid stretches |
What It Costs
Prices scale with wattage and battery size more than with brand:
- Weekend setup (100-150W, no battery upgrade): roughly $250-$500.
- Regular van dweller (200-400W + lithium battery): roughly $800-$2,000.
- Full-time rig (400-800W + larger battery bank): roughly $2,000-$4,000+.
A DC-DC charger, inverter, or monitoring app adds to the total but isn’t required to get a working system — most van builds start simple and add components as they figure out what they actually use.
Installing It: What to Expect
- Pick a shade-free mounting spot. Vents, AC units, and roof racks all cast shade that can meaningfully cut a panel’s output, even partially.
- Clean and degrease the roof before mounting — adhesive-mounted panels need a clean surface to bond properly.
- Seal every roof penetration. A dedicated cable gland with sealant is the single most common point of leaks on a van solar install — don’t skip it.
- Wire in order: battery to controller, then panel to controller. Check your kit’s manual, since some components are sensitive to connection order.
- Let adhesive cure fully — typically 24-48 hours — before hitting the highway.
If you’d rather understand exactly how a plug-and-play system works before buying one, see our breakdown of how plug-and-play solar kits work.
Keeping It Running
- Wipe panels down every few weeks on the road — road film cuts output more than most people expect.
- Recheck shade sources if you add a roof rack, antenna, or vent fan after the initial install.
- Glance at your monitoring app periodically if your kit has one, so a failing connection shows up before your battery runs dry.
- Keep the battery temperature-protected. Lithium batteries lose capacity and can be damaged by charging in freezing temperatures — a battery box with basic insulation solves this in most climates.
FAQ — Van Solar Panels
How many watts of solar do I need for a van?
It depends on how you use the van. Weekend trips with basic lighting and phone charging are usually fine with 100-150W. Regular van dwellers running a fridge and a laptop typically want 200-400W, and full-timers working remotely or running extra appliances often go 400-800W.
Can I run my van’s fridge on solar alone?
Yes, for most compressor fridges — they typically draw 400-600 Wh/day, which a 150-200W panel and a modest lithium battery can cover on an average sunny day. Extended cloudy stretches will eat into your battery reserve faster than the panel can replace it.
Roof-mount or portable panels — which should I choose?
Roof-mount if you want power without thinking about it, especially if you tend to stay in one spot for a few days. Portable if you frequently park in shade and want the flexibility to move the panel into full sun, or if you’re not ready to commit to a permanent roof install.
Do I need a permit to install solar on my van?
No, in nearly all cases — van solar is treated as a vehicle modification, not a structural build, so it doesn’t require a building permit the way home solar does. It’s still worth confirming your setup doesn’t affect vehicle height restrictions if you’re adding a raised mount.
How long does a van solar setup last?
Panels are typically rated for 20-25 years with only gradual output loss. A lithium battery, if kept out of temperature extremes, commonly lasts 10-15 years. Charge controllers tend to be the first component to need replacing, usually somewhere in the 8-12 year range.
Flexible or rigid panels for a van roof?
Rigid panels are the more durable, longer-lasting choice for most van roofs and are what we’d recommend by default. Flexible panels make sense mainly if your roof is curved or if every pound of weight matters — just expect a shorter lifespan and some output loss in high heat.
Explore our other plug-and-play guides: RV solar kits, shed solar kits, and balcony solar kits. Still weighing a kit against a standalone panel? See why people choose plug-and-play.