Installing a solar system on a shed eliminates the need for expensive trenching and grid connections, allowing you to produce and store energy locally. However, many DIYers struggle when their heavy power tools cause system trips due to intense inductive load surges during startup.
Finding the right solar kit for shed reviews is the first step toward building a reliable off-grid workspace that handles these peaks. We will help you calculate your wattage needs and select the specific hardware required to keep your workshop running smoothly.
- Solar Kit for Shed Reviews: Start With an Energy Audit
- Core Hardware for a Reliable Off-Grid Workspace
- Safety and Wiring Standards for DIY Shed Solar
- Choosing Between All-in-One Kits and Custom Builds
Solar Kit for Shed Reviews: Start With an Energy Audit
Off-grid shed solar requires a precise energy audit focusing on inductive load surges from power tools, typically requiring LF inverters and LiFePO4 batteries for stability. Sizing depends on peak wattage and daily consumption. This data is vital for calculating peak wattage for tool surges.
Calculating Peak Wattage for Power Tool Surges
List every tool to identify continuous power versus peak surge needs. Saws and compressors pull three times their rated wattage during startup. This inductive load is the primary cause of system trips in small workshops. Check your labels carefully.
Use a worksheet to sum concurrent loads. Include lights and chargers alongside heavy machinery. This total determines your inverter’s minimum capacity.
Saws and compressors pull 3x rated wattage during startup; inductive loads are the primary cause of system trips.
- Common tool wattages, surge multipliers for inductive loads, and concurrent usage examples.
Estimating Battery Capacity for Daily Runtime Needs
Multiply wattage by hours of use for daily consumption. Adjust for local peak sun hours. Winter months drastically reduce available light.
Include a safety margin for cloudy days. This prevents deep discharge cycles. Battery health depends on maintaining these limits.
A robust energy audit is the difference between a functional workspace and a dead battery by noon.
Proper sizing ensures longevity. Calculate carefully before buying components.
Core Hardware for a Reliable Off-Grid Workspace
Once the energy audit defines your needs, selecting the right hardware components becomes the next critical step for reliability.
Comparing Low-Frequency and High-Frequency Inverter Types
Select low-frequency inverters for heavy workshops. They handle motor-starting surges better than high-frequency units. The heavy copper transformer provides superior durability.
Analyze idle power draw trade-offs. Heavy transformers consume more energy while sitting idle.
Match the surge rating. Ensure it handles your largest tool.
Evaluating LiFePO4 vs Lead-Acid Batteries in Sheds
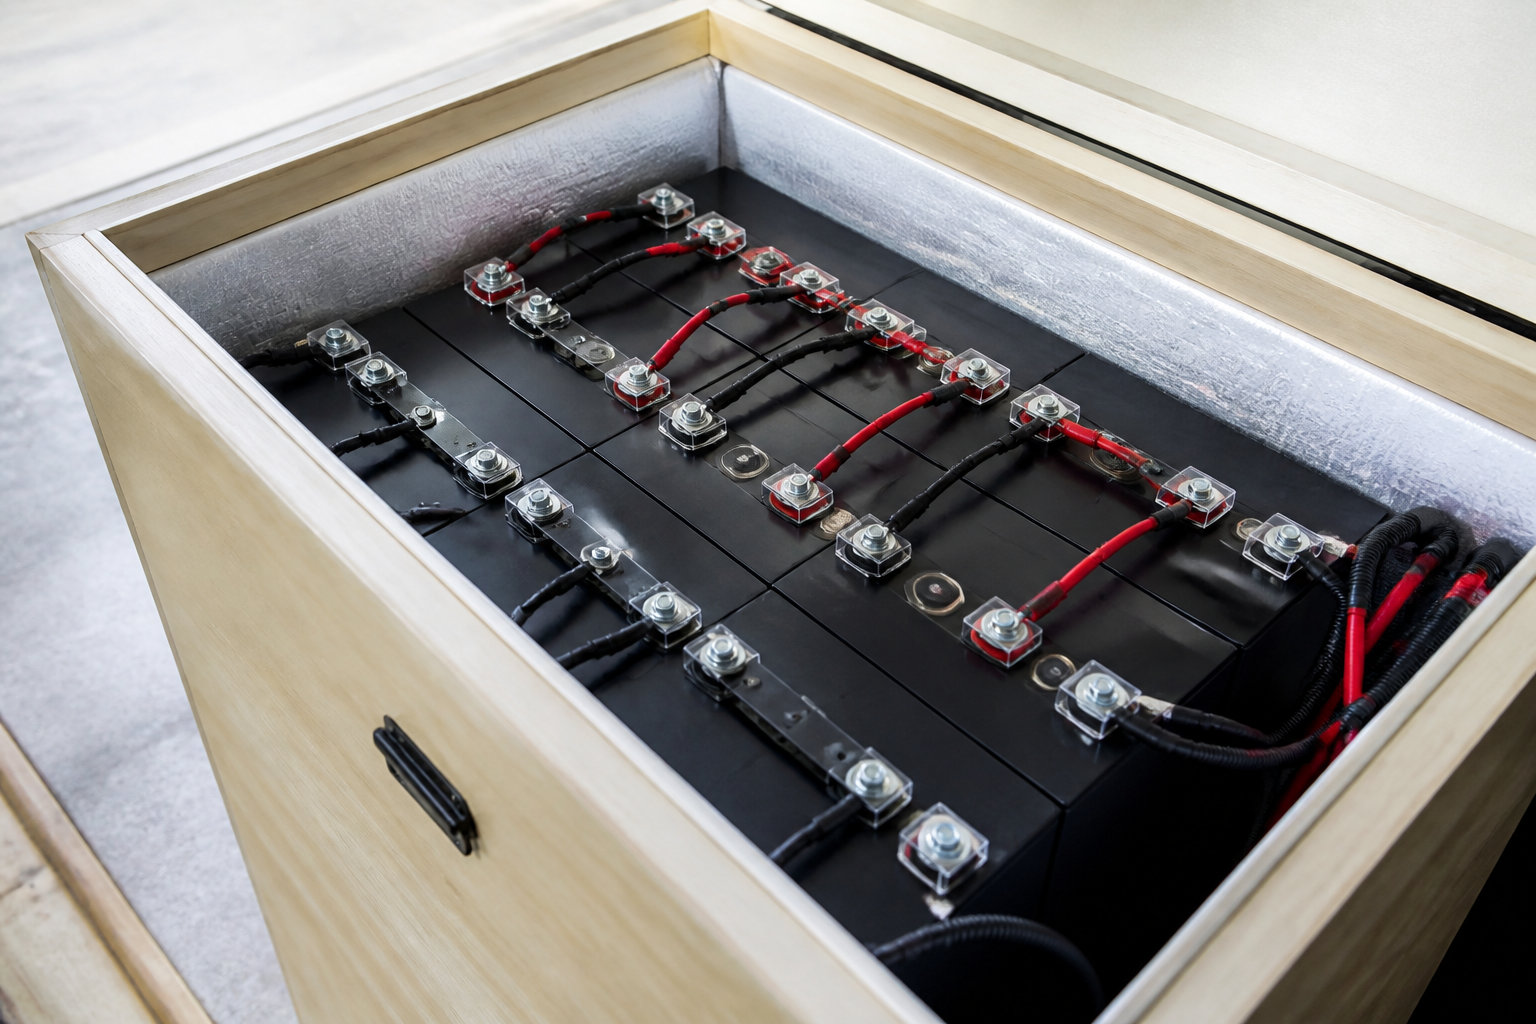
Prioritize LiFePO4 for longevity. These batteries offer higher depth of discharge limits. They are ideal for daily shed use.
When comparing lithium vs lead-acid solar storage, lithium wins on long-term value. Lead-acid remains a budget-friendly but limited alternative.
Insulate battery boxes. Temperature sensitivity affects lithium performance in sheds.
Optimizing Solar Harvest With MPPT Charge Controllers
Utilize MPPT controllers for maximum power extraction. They outperform PWM units in fluctuating light. This is vital for shed roofs.
Match controller voltage to the bank. Panels must align with the string configuration.
Monitor real-time yield constantly. Tracking system health identifies efficiency factors quickly.
Safety and Wiring Standards for DIY Shed Solar
High-quality hardware only performs well if the underlying wiring and safety protocols meet professional standards.
Mastering Grounding Rules and the Single Rod Requirement
Follow the single ground rod rule strictly. This prevents dangerous ground loops between structures. Safety depends on a unified grounding bus.
Connect the inverter chassis and frames. Everything must be bonded correctly. Check these diy solar shed installation safety standards to stay compliant.
Install lightning arrestors immediately. High-exposure locations require this extra layer of protection.
Protecting DC Circuits With Metal Conduit and Breakers
Run DC wiring through metal conduit. This satisfies local safety codes. It also prevents physical damage from tools.
Implement subpanels with individual breakers. This ensures safe 110V distribution to outlets. Never bypass these essential safety components.
| Component | Maintenance Task | Frequency | Goal |
|---|---|---|---|
| Solar Panels | Cleaning | Annual | Max output |
| Battery Terminals | Tightening | Bi-annual | Prevent heat |
| Inverter | Dusting | Quarterly | Airflow |
| Wiring | Visual Inspection | Annual | Safety check |
| Charge Controller | Log Review | Monthly | Health check |
Choosing Between All-in-One Kits and Custom Builds
With safety protocols established, you must decide whether to buy a pre-packaged system or assemble custom components.
Benefits of Plug-and-Play AIO Solar Generator Units
Simplify installation with all-in-one units. These combine the inverter and controller. They are perfect for beginners.
Evaluate portable power stations for light-duty sheds. These work well for tool charging. Explore why buy a solar panel plug and play units for speed.
Assess the limitations carefully. Non-serviceable internal batteries are a major drawback in pre-made kits.
Advantages of Modular Component-Based System Architecture
Build a custom system for easy repairs. Modular components allow for simple future upgrades. You can replace single parts easily. This flexibility is vital for growing workshops.
Integrate backup generators easily. These handle high-draw tools during cloudy periods.
Select rigid roof mounts carefully. Ensure the shed’s structural integrity can support the weight for your solar kit for shed reviews: powering your off-grid workspace.
By conducting a precise energy audit and selecting LiFePO4 batteries paired with low-frequency inverters, you ensure your workspace handles heavy tool surges reliably. Secure your setup with proper grounding and MPPT controllers to maximize daily harvest. Start building your energy independence today to transform your shed into a high-performance, off-grid powerhouse.
FAQ
How do I choose the right solar kit for my shed workspace?
Selecting the perfect setup starts with a precise energy audit. You need to calculate your daily consumption in Watt-hours (Wh) by listing every tool, its wattage, and how long you plan to use it. Don’t forget to account for inductive load surges from power tools, which can pull three times their rated power during startup.
For light needs like LED lighting and phone charging, a 50W to 150W panel with 500Wh of storage is usually plenty. However, if you’re running a full workshop with heavy machinery, you’ll want to look at 300W to 500W+ panels and at least 2kWh of battery capacity to ensure you don’t run out of juice by noon.
Which battery type is best for an off-grid workshop?
We highly recommend LiFePO4 (Lithium Iron Phosphate) batteries for any serious workspace. Unlike traditional lead-acid batteries that you can only discharge to 50%, LiFePO4 units allow you to use 80% to 90% of their capacity without damage. They also last significantly longer, offering between 3,000 and 6,000 cycles, which means a lifespan of 10 to 15 years.
While lead-acid options like AGM or Gel are cheaper upfront, they require frequent replacements and regular maintenance. Investing in Lithium provides better efficiency and a much lower total cost of ownership over time. Just remember to insulate your battery box, as lithium performance can dip in freezing temperatures.
Do I need a specific type of inverter for my power tools?
Yes, the type of inverter matters immensely when high-draw tools are involved. We suggest low-frequency inverters for workshops because they use heavy copper transformers that handle motor-starting surges much better than high-frequency units. They are built for the “iron and copper” toughness required by industrial-style loads.
High-frequency inverters are lighter and more efficient for electronics, but they can be sensitive to extreme load variations. Always match the surge rating of your inverter to your largest tool to prevent system trips and ensure a reliable flow of 110V power to your outlets.
Are plug-and-play solar kits worth it for a DIY shed?
Plug-and-play units, like portable power stations from brands like EcoFlow or BLUETTI, are fantastic for beginners who want a simple, fast installation. These all-in-one kits combine the inverter and controller into one box, making them perfect for mobile tool charging or light-duty office work.
However, for a growing workshop, a modular component-based system offers more flexibility. With a custom build, you can easily upgrade individual parts or replace a single battery without tossing the whole unit. It also makes it easier to integrate backup generators for those cloudy winter months when solar harvest is low.
What are the safety requirements for wiring a solar shed?
Safety is paramount, so you must follow the single ground rod rule to prevent dangerous ground loops between your house and the shed. Ensure that the inverter chassis and all solar panel frames are properly bonded to a unified grounding bus. This keeps your workspace safe from electrical faults.
You should also run your DC wiring through metal conduit to protect it from physical damage and satisfy local codes. Always implement a subpanel with individual breakers for your outlets. A robust setup isn’t just about power; it’s about ensuring your off-grid dream doesn’t become a fire hazard.