We often spend more time worrying about our gear flying off on the highway than enjoying the sunset at a remote campsite. Choosing the right solar panel mounting options for RV roofs is the only way to ensure your energy system survives thousands of miles of road vibration and high-speed winds. One loose bolt or failing adhesive can turn a perfect off-grid setup into a costly repair project.
We are here to help you navigate these choices by comparing rigid brackets and flexible adhesives so you can secure your power source with total confidence. Let’s break down the best methods to achieve a stable, leak-proof installation for your home on wheels.
- Solar Panel Mounting Options for RV Roofs: Rigid vs Flexible
- 3 Methods for Achieving a Leak-Proof Installation
- How to Handle Custom Fabrication for Curved RV Roofs?
- Airflow and Wind Management for Maximum Panel Efficiency
Solar Panel Mounting Options for RV Roofs: Rigid vs Flexible
Rigid panels require Z-brackets for airflow, while flexible modules use adhesives for curved surfaces. Stainless steel hardware ensures durability, but flexible options offer low-profile benefits for height-restricted vehicles using 3M VHB tape.
The mention of Z-brackets leads directly into the discussion of rigid panel stability.
Rigid Panels With Z-Brackets and Mounting Feet
Z-brackets provide the best stability for heavy glass panels. They distribute weight effectively across fiberglass or metal roofs. This setup prevents structural strain during travel.
Stainless steel mounting feet offer incredible long-term durability. These components resist corrosion effectively. They are perfect for salty or humid coastal environments.
Rigid mounting handles high-speed wind loads better than temporary solutions. These brackets maintain a fixed position during bumpy off-road segments.
“Rigid panels mounted with Z-brackets remain the industry standard for long-term durability and consistent power output in diverse climates.”
Flexible Panels for Curved Roof Profiles
Thin-film modules have specific adhesive requirements for a secure bond. These panels attach directly to the roof surface. You won’t need heavy metal frames or drilling.
We see great low-profile benefits for height-restricted vehicles like camper vans. You can compare these to traditional setups by looking at flexible vs rigid solar panels for vans. They stay sleek.
Adhesives might fail on textured surfaces without care. Proper surface preparation is mandatory for safety. This prevents the panel from peeling off at high speeds.
3 Methods for Achieving a Leak-Proof Installation
Choosing the right panel is just the start; keeping the water out of your living space is where the real work begins.
Mechanical Fastening to Roof Joists Versus Sheathing
Locate roof joists to achieve maximum pull-out strength. Using joists is safer than relying on thin plywood sheathing for heavy arrays. This ensures stability during travel.
Match screw penetration depths to your specific RV roof thickness. Checking a camper solar panel kit helps determine the right hardware. Stainless steel bolts resist weather best.
Always use lap sealant around every screw head to prevent moisture from reaching the wood substrate and causing structural rot.
Apply sealant to every single penetration. This simple barrier stops moisture from reaching the wood substrate effectively.
Adhesive Bonding Techniques for Drill-Free Setups
Apply 3M VHB tape for fiberglass installations. This high-bond tape creates a permanent seal without puncturing the roof membrane. It works perfectly for flexible panels.
Follow a guide for testing adhesive bond strength. Clean the area with isopropyl alcohol and apply pressure for sixty seconds. This ensures a reliable, long-term hold.
Bonding is preferred for newer PVC or TPO roofs. It maintains the manufacturer’s structural integrity and warranty. We find this avoids unnecessary damage.
Managing Wiring Through Entry Glands and Vents
Install cable entry glands with heavy lap sealant. These plastic housings protect wires and the hole from UV and rain. They offer a professional finish.
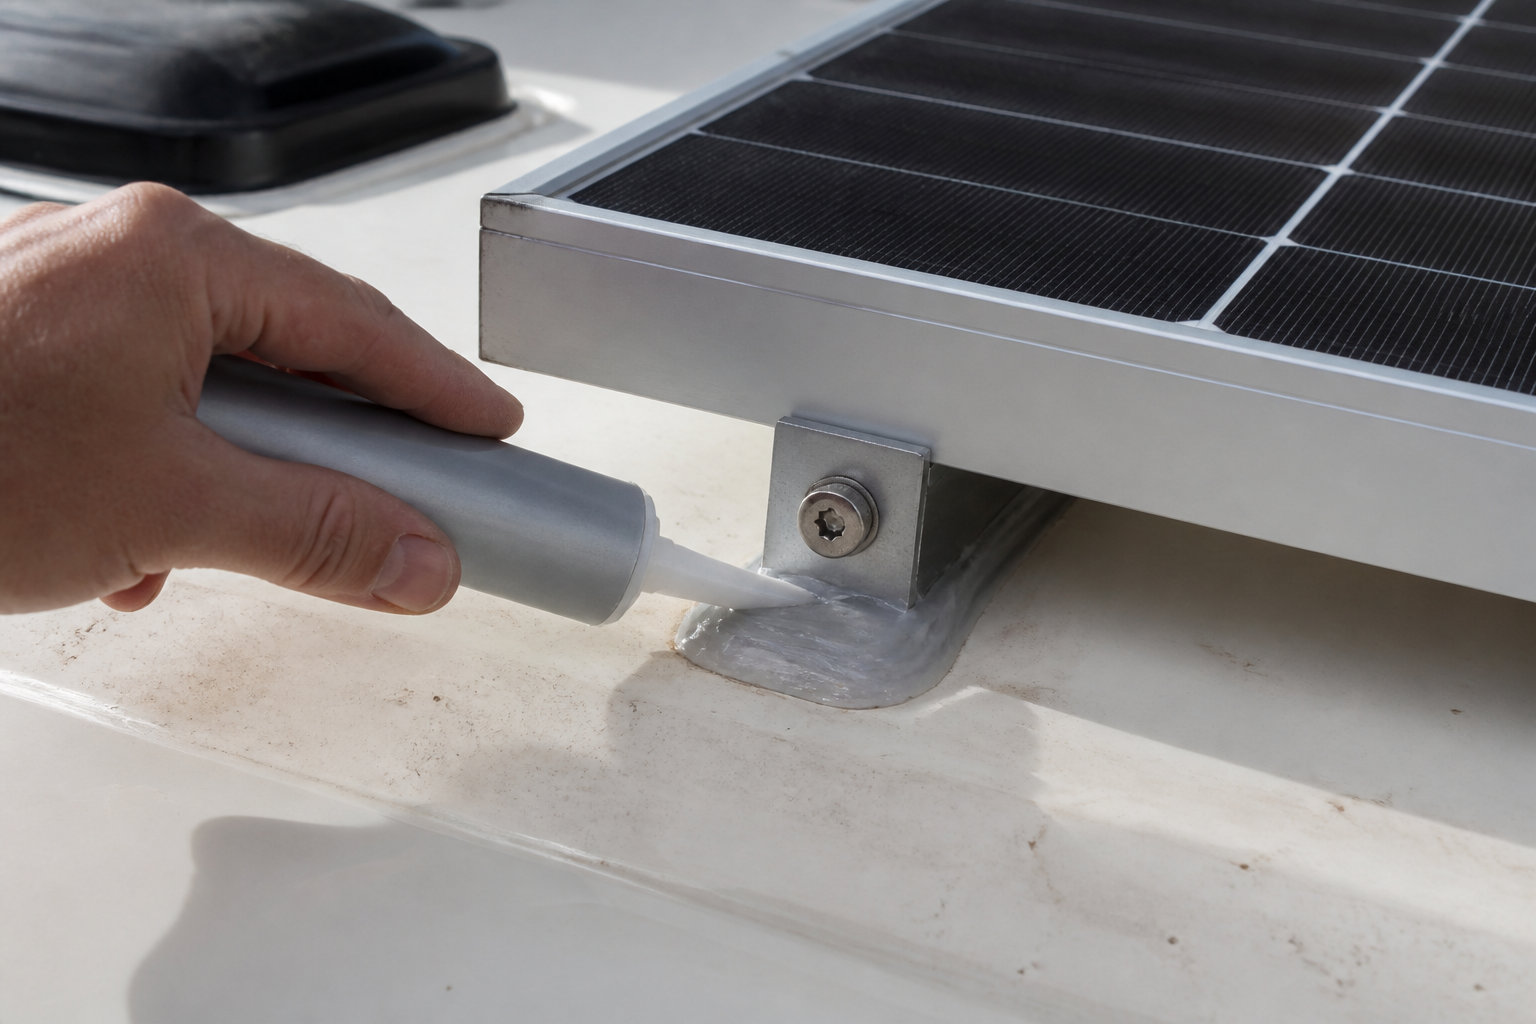
Use existing refrigerator vents to avoid new roof holes. This clever routing saves time and reduces the risk of future leaks. It simplifies the entire process.
Following diy solar shed installation safety standards keeps your wiring secure. Proper management prevents energy loss and ensures safety.
How to Handle Custom Fabrication for Curved RV Roofs?
Standard brackets don’t always fit the unique contours of modern aerodynamic motorhomes, requiring a bit of creative engineering.
Using Unistrut Systems for Structural Flexibility
We often recommend Unistrut channels for modular array expansion. These versatile rails allow you to slide panels into the perfect position easily. You get total control over the layout.
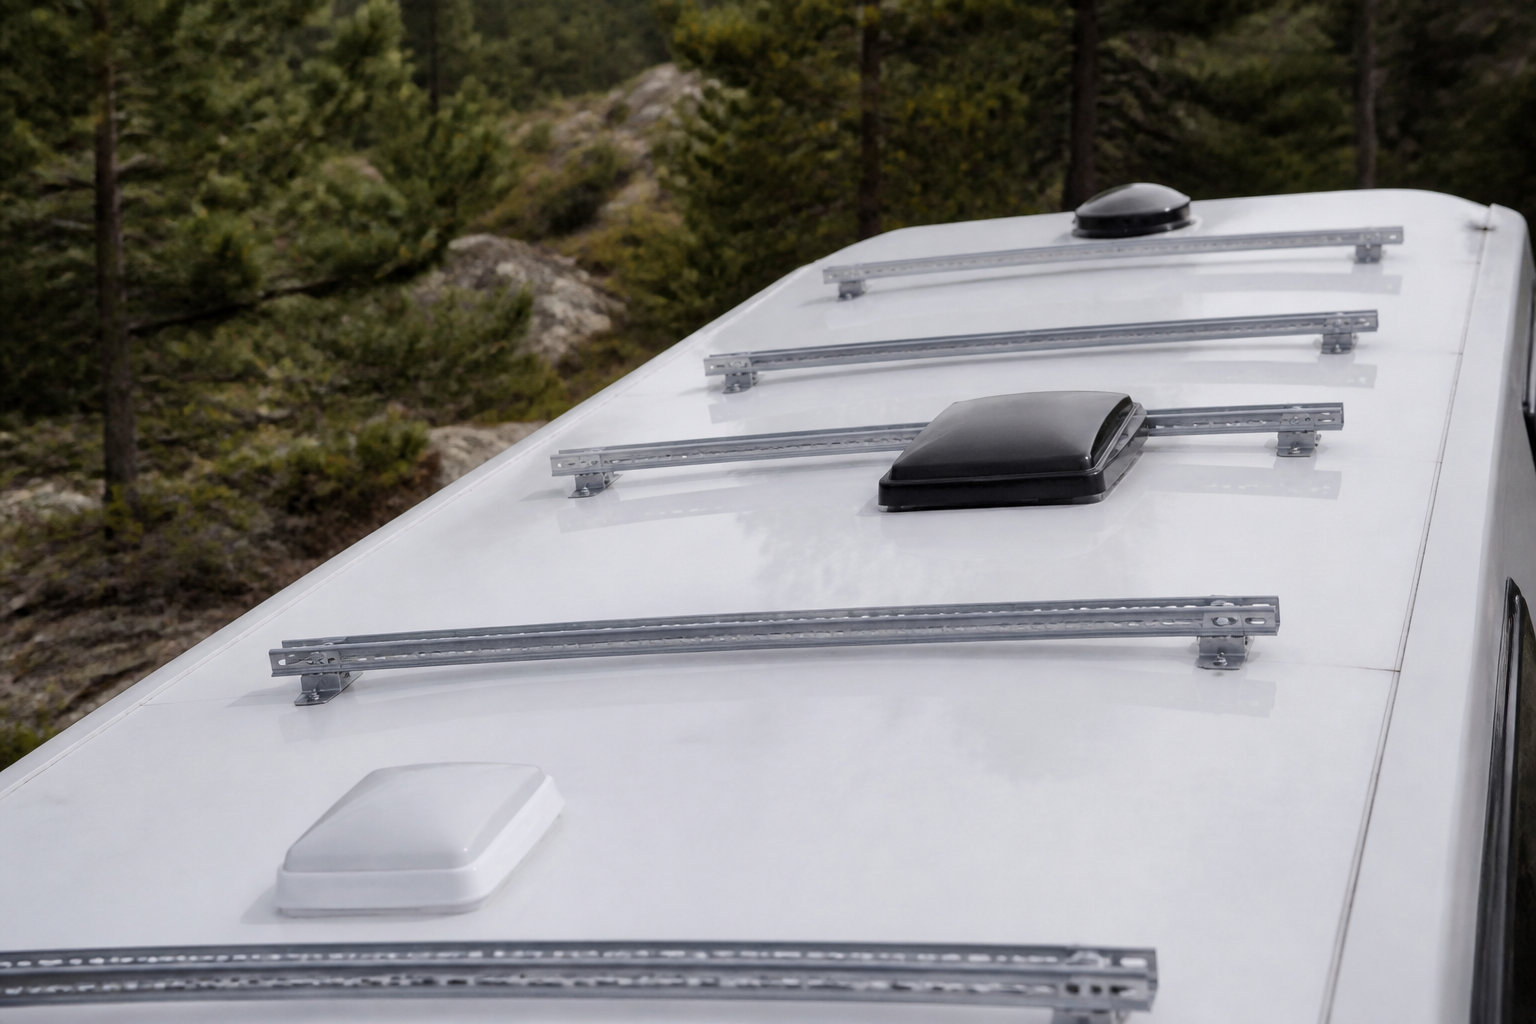
These rails create a level plane on irregular roof surfaces. This clever setup prevents stress on the solar panel frames caused by twisting. It keeps your hardware safe and perfectly aligned.
You can find more details on mounting on roofs to ensure your setup stays secure. It is a smart move for any van owner.
Aluminum Shims and Custom Bracket Adjustments
We suggest using aluminum shims for leveling mounting feet on steep curves. These small spacers ensure the bracket sits flush against the roof surface. No more awkward gaps or unstable mounts.
Fabrication techniques for non-standard curvatures are sometimes necessary for a secure, gap-free fit. Bending standard brackets in a vice is a simple way to match your RV’s specific roof shape.
- Aluminum grade 6061 for shims
- Stainless steel bolts
- EternaBond tape for shim sealing
- Nylon locking nuts
Airflow and Wind Management for Maximum Panel Efficiency
Beyond just staying attached, your panels need to breathe and fight the wind to perform at their peak.
Maintaining Clearance for Thermal Cooling Benefits
Air gaps prevent panel overheating by allowing heat to escape. High temperatures cause voltage drops. Keeping panels cool is vital for maximizing your daily energy harvest.
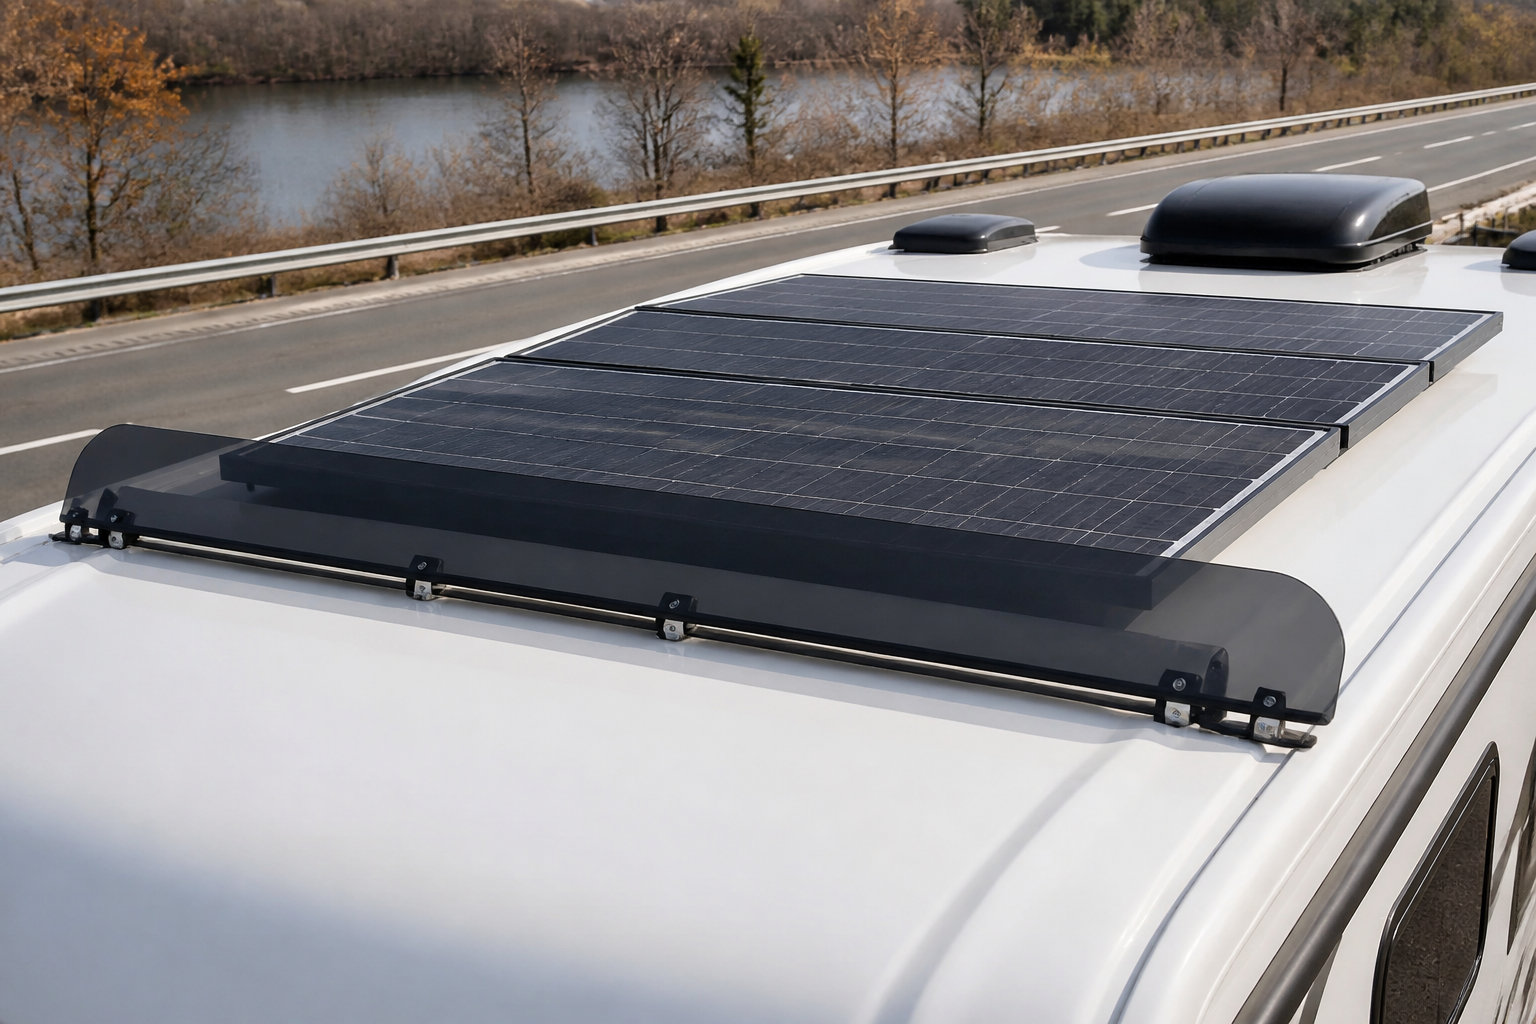
We see a thermal shading effect benefit here. Panels act as a secondary roof. This keeps your cabin significantly cooler during those harsh summer months.
Proper optimisation thermique ensures your system remains reliable. Good airflow simply protects your long-term investment.
Aerodynamic Considerations for High-Speed Travel
Installing a wind deflector helps minimize drag significantly. High speeds create upward lift that can rip panels off. A front-facing spoiler reduces noise and vibrations during highway hauls.
Check your hardware torque regularly. Bolts loosen over time due to road vibrations. Thermal expansion also affects the tightness of your mounting gear.
| Mounting Method | Airflow Rating | Wind Resistance | Best For |
|---|---|---|---|
| Z-Brackets | High | High | Standard RVs |
| Flexible Adhesive | Low | High | Campervans |
| Unistrut Rails | High | Medium | Custom builds |
| Tilt Mounts | Very High | Low (when up) | Stationary use |
Choosing the right solar panel mounting options for RV roofs ensures long-term stability and maximum energy efficiency. Whether you opt for rigid Z-brackets for airflow or flexible adhesives for curved profiles, proper surface preparation and structural anchoring are vital. Secure your energy independence today and enjoy worry-free, sustainable adventures under the sun.
FAQ
What are the most reliable mounting options for my RV solar panels?
We recommend using stainless steel Z-brackets or L-brackets for permanent installations of rigid panels. These metal mounts provide maximum stability and are designed to withstand high-speed highway winds and bumpy off-road conditions while ensuring your panels stay securely attached to the roof.
For those who prefer a drill-free approach, industrial-strength adhesives like 3M VHB tape are fantastic for flexible modules. This method is much faster to install and is particularly effective for curved roof profiles where traditional metal frames simply won’t fit.
Can I install solar panels on a curved RV roof without drilling?
Yes, you absolutely can! We suggest opting for flexible monocristalline panels that naturally conform to the irregular shape of your vehicle. By using a specialized 3M adhesive kit, you can bond the panels directly to the surface, maintaining your roof’s structural integrity and avoiding any potential leak points from screws.
To ensure a permanent bond, it is vital to properly prepare the surface by cleaning and lightly sanding the area. This adhesive-based setup is incredibly low-profile, making it the perfect solution for height-restricted camper vans or aerodynamic motorhomes.
How do I ensure my roof installation remains completely leak-proof?
Achieving a 100% waterproof seal is our top priority during any installation. When using mechanical fasteners, we always apply a generous amount of lap sealant, such as Dicor or Sika, around every screw head and bracket base to block moisture from reaching the roof substrate.
For the wiring, we recommend installing a UV-resistant cable entry gland. This protective housing uses high-quality gaskets and sealant to guide your cables into the cabin safely, preventing rain and debris from entering the hole you’ve drilled for the electrical connection.
Is it better to use rigid or flexible panels for a long-term RV setup?
If you are looking for maximum durability and efficiency, rigid panels with aluminum frames are the industry standard. They offer superior airflow, which prevents overheating and maintains high power output even in extreme climates. Their tempered glass construction is built to last for many years of full-time travel.
However, if weight and aesthetics are your main concerns, lightweight flexible panels are a brilliant alternative. While they might have a shorter lifespan than rigid glass, their ease of installation and ability to fit on almost any surface make them a favorite for DIY enthusiasts and smaller van builds.
Why is maintaining an air gap under my solar panels so important?
We emphasize creating an air gap because solar panels actually lose efficiency as they get hotter. By using Z-brackets to lift rigid panels off the roof, you allow for natural thermal cooling, which significantly boosts your daily energy harvest and protects the panels from heat-related damage.
Additionally, this gap creates a thermal shading effect for your RV. The panels act as a secondary roof, absorbing the sun’s intensity and keeping your interior living space much cooler during those hot summer afternoons at the campsite.